Reading: Using Python Locally
Last unit we have been using Python in a Google Colab environment, which is a cloud-based platform. However, you can also run Python locally on your own machine. This can be useful for various reasons, such as working offline, using specific libraries, referencing your files directly without uploading them, or running larger projects. This document provides a brief overview of how to use Python locally, including installation, running scripts, and managing packages. We will also discuss some common IDEs (Integrated Development Environments) that can help you write and run Python code more efficiently. In class, we will give a live demonstration of how to install Python and run a simple script locally. We will also show you how to use Jupyter Notebook, which is a popular tool for writing and running Python code in an interactive environment.
Basic Concepts
Before we get into the details, here is an overview of some basic concepts that will be useful in this unit.
Installing and running Python locally
In Colab, Python is already installed and you can run Python scripts directly from the notebook. Colab also provides most of the packages that you need. When running locally, you need to install Python and the packages you need.
Once you have installed Python, you can run it directly from the terminal. For example, you could use a text editor to write a Python script and save it to a file:
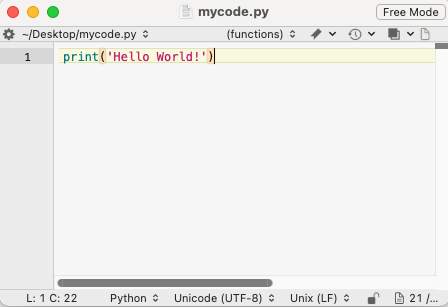
and then run it using the following command:
python mycode.py
and the output would be:
Hello World!
Installing packages
After you have installed Python, you can install additional packages using pip. pip is a package manager for Python that allows you to install additional libraries and packages.
For example, to install NumPy and Pandas, you can run:
pip install numpy pandas
There is another package manager called conda that is also used to install packages. It works similarly to pip, but it is more powerful and can install packages from multiple sources. To get started and to keep things simple for now, we will use pip for installing packages.
Using an IDE
While you can edit a Python script in a text editor, the best and most efficient way to write and run Python code is to use an Integrated Development Environment (IDE). There are a variety of IDEs available, including Visual Studio Code (VS Code), PyCharm, and Spyder. We recommend that you start with VS Code. It is free and open-source.
When you use an IDE, you can write and run Python code directly from the IDE, and the IDE provides features like code completion, code formatting, etc.
Using Git
There is a website called GitHub that provides a platform for hosting and collaborating on code. You can use GitHub to store your code, share it with others, and collaborate on projects. It is also a great place to explore other Python developers' code. You can easily "clone" a repository (a copy of a project) from GitHub to your local machine and start working on it.
Python Local Development Setup Guide
Now that we have covered the basics, let's get started. This guide will walk you through installing Python, VS Code, and Git on your laptop. Follow the appropriate section for your operating system.
🪟 Windows
1. Install Python
- Go to python.org/downloads
- Click Download Python 3.x.x (the big yellow button). If the yellow button says "Download Python Install Manager", click the hyperlink below that says "get the standalone installer for Python 3.x.x"
- Run the installer
- ⚠️ Important: Check the box that says "Add Python to PATH" before clicking Install
- Click Install Now
- Verify it worked — open Command Prompt (search "cmd" in the Start menu) and type:
python --version
You should see something like Python 3.12.0
2. Install VS Code
- Go to code.visualstudio.com
- Click Download for Windows
- Run the installer — the defaults are fine
- When prompted, check "Add to PATH" and "Open with Code" options
- Open VS Code and install the Python extension:
- Click the Extensions icon on the left sidebar (or press Ctrl+Shift+X)
- Search for Python (by Microsoft)
- Click Install
3. Install Git
- Go to git-scm.com/download/win
- Download and run the installer
- All default options are fine — just keep clicking Next
- Verify it worked — open Command Prompt and type:
git --version
4. Install Packages with pip
Open Command Prompt and use pip to install packages:
pip install numpy
pip install pandas matplotlib # you can install multiple at once
🍎 Mac
1. Install Python
- Go to python.org/downloads
- Click Download Python 3.x.x (the big yellow button)
- Open the downloaded .pkg file and follow the installer steps
- Verify it worked — open Terminal (search "Terminal" in Spotlight with Cmd+Space) and type:
python --version
You should see something like Python 3.12.0
Note: On older Macs (pre-2022, before macOS Monterey 12.3), you may need to use python3 and pip3 instead of python and pip. If python --version shows an error or Python 2.x, use python3 instead.
Note: Some Macs may prompt you to install Xcode Command Line Tools during Python installation or when you first run python in Terminal. If you see this prompt, click Install and wait for it to finish. You can also install them manually by running the following in Terminal:
xcode-select --install
2. Install VS Code
- Go to code.visualstudio.com
- Click Download for Mac
- Open the downloaded .zip, then drag Visual Studio Code to your Applications folder
- Open VS Code, then install the Python extension:
- Click the Extensions icon on the left sidebar (or press Cmd+Shift+X)
- Search for Python (by Microsoft)
- Click Install
3. Install Git
Git may already be installed on your Mac. Check by opening Terminal and typing:
git --version
If it's not installed, you'll be prompted to install Xcode Command Line Tools — just click Install and follow the steps. That will install Git automatically.
4. Install Packages with pip
Open Terminal and use pip to install packages:
pip install numpy
pip install pandas matplotlib # you can install multiple at once
Note: If you get an error like pip: command not found, pip may not be in your PATH. Try the following fixes:
- Use
pip3instead ofpip:
pip3 install numpy
- If
pip3also doesn't work, you may need to add Python to your PATH. Run this command in Terminal (replacing3.12with your installed Python version):
echo 'export PATH="/Library/Frameworks/Python.framework/Versions/3.12/bin:$PATH"' >> ~/.zshrc
source ~/.zshrc
Then try pip install numpy again.
🚀 Running Your First Script in VS Code
- Open VS Code
- Go to File → Open Folder and open a folder for your project
- Create a new file: File → New File, name it hello.py
- Type some code:
print("Hello, world!")
- Run it by clicking the ▷ Play button in the top-right corner, or open the Terminal inside VS Code (Terminal → New Terminal) and type:
python hello.py
Jupyter Notebook
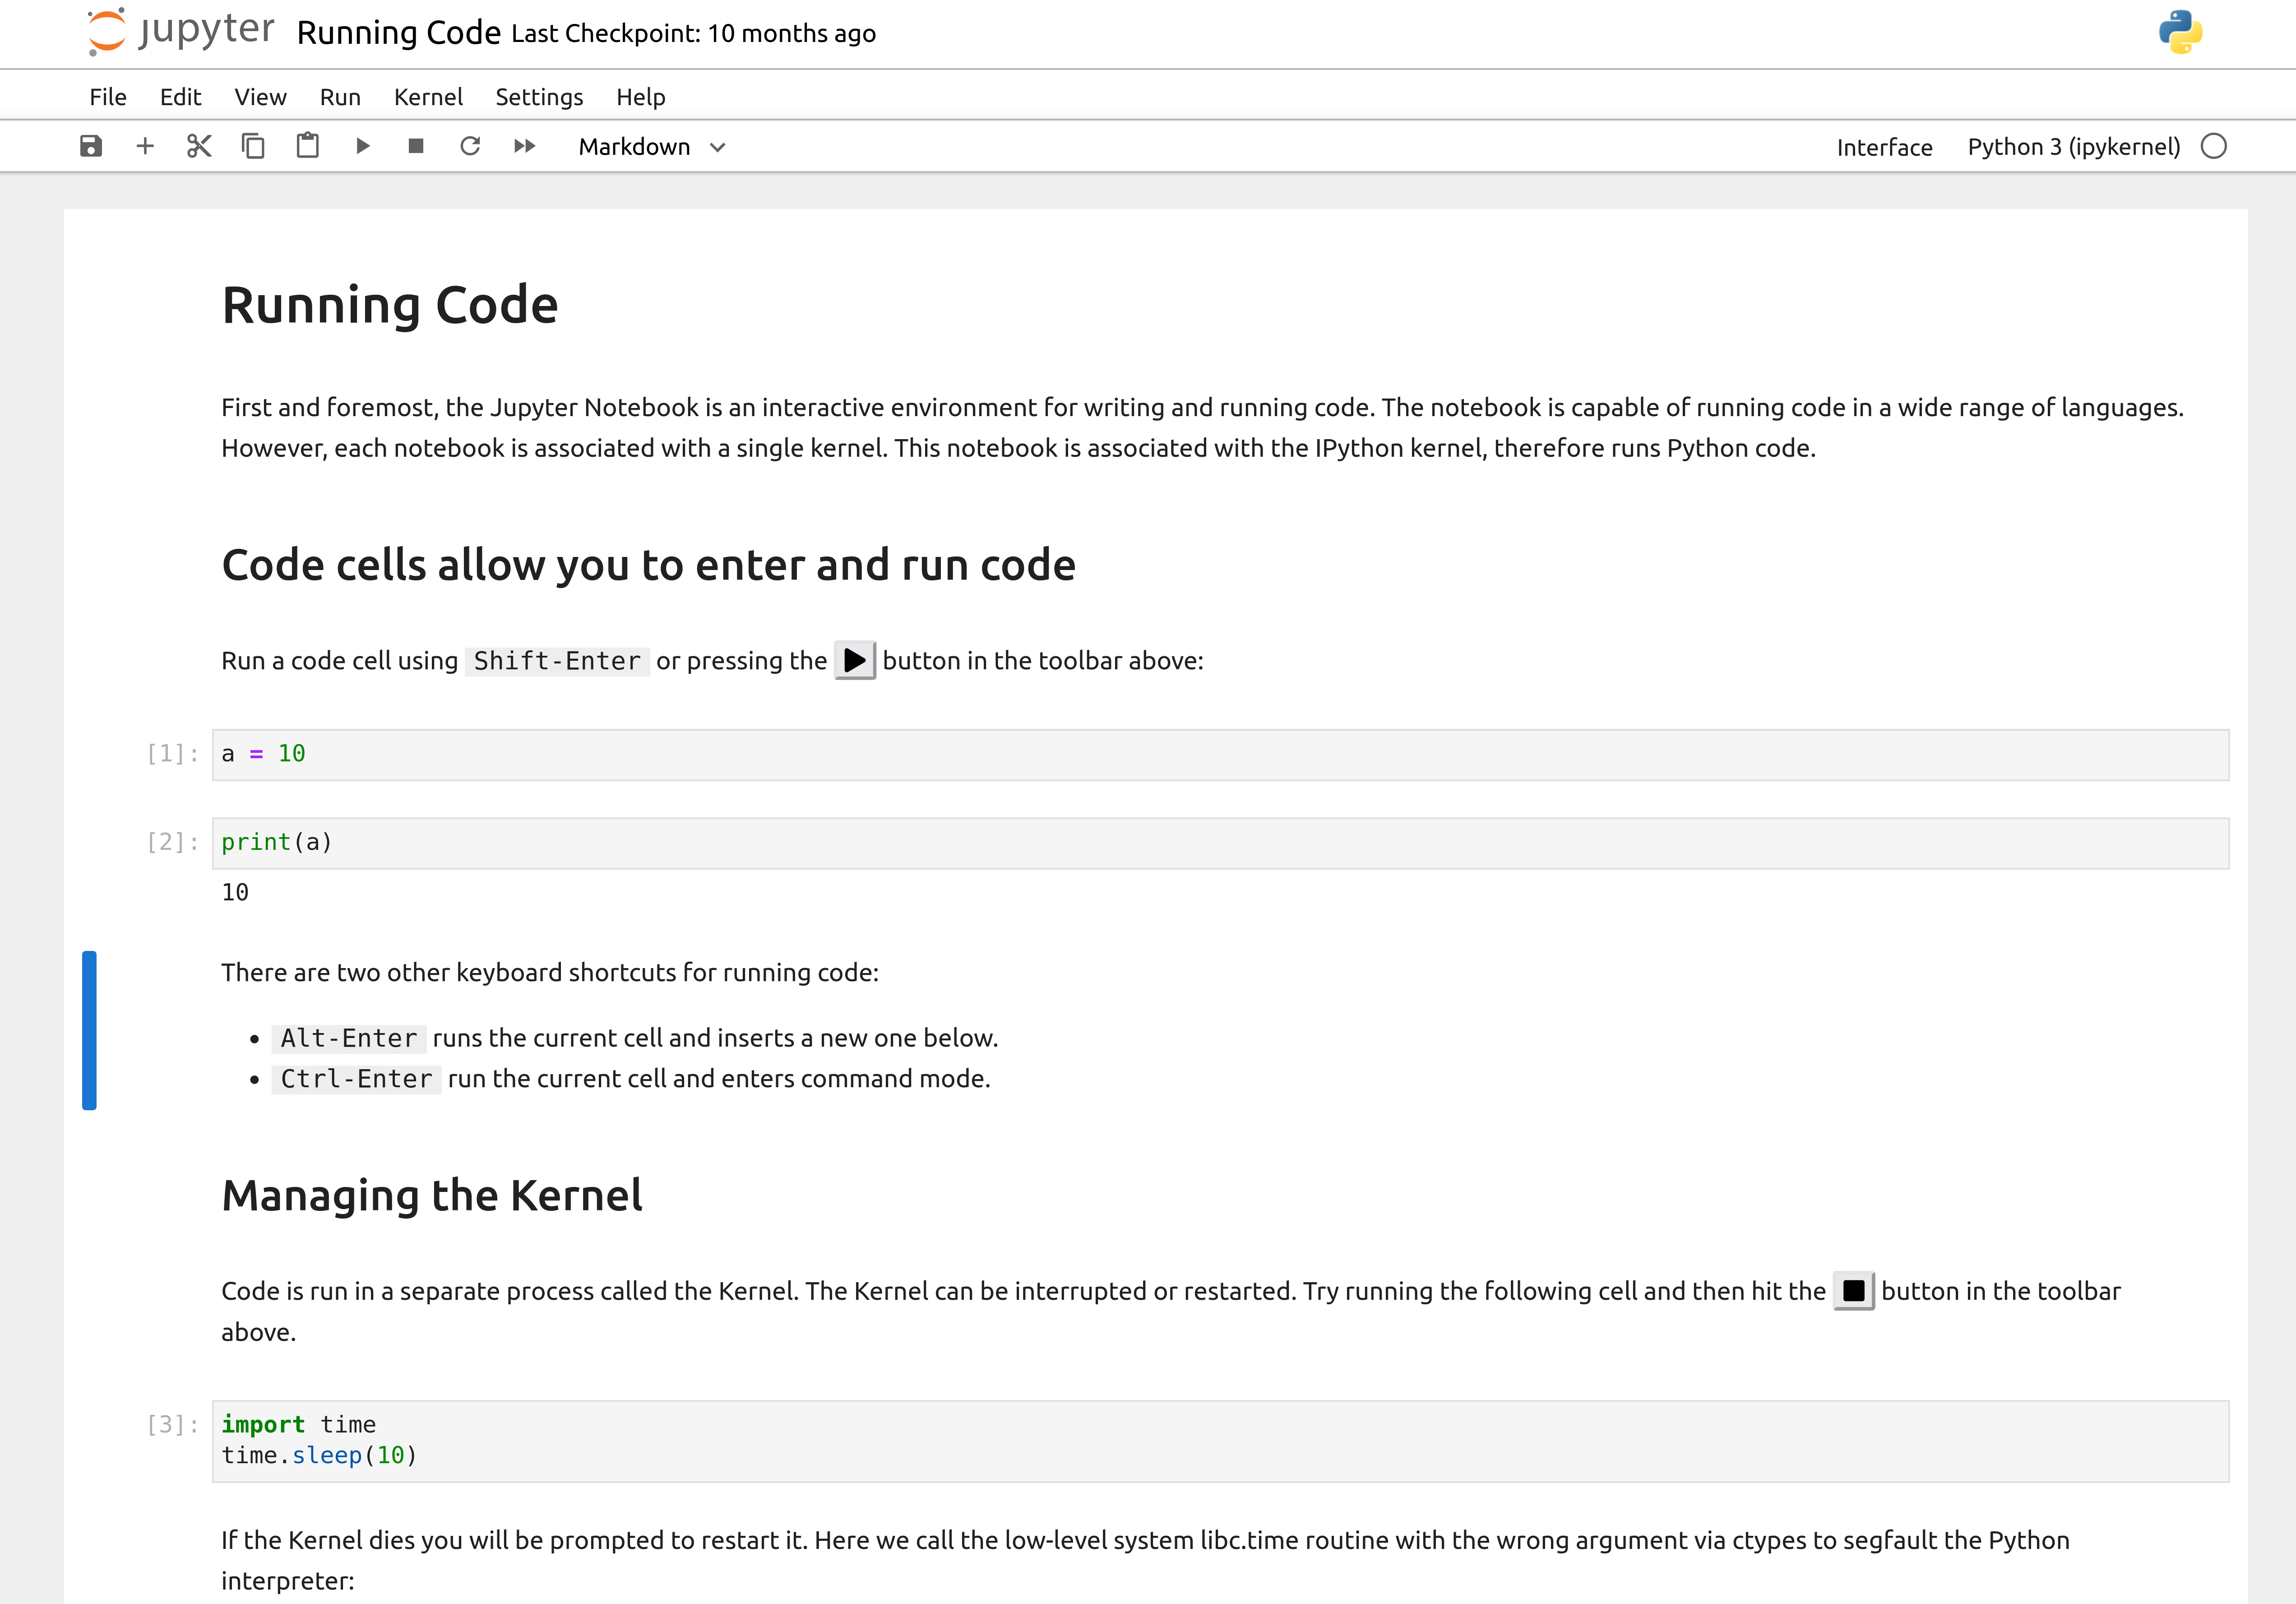
In addition to VS Code and other IDEs mentioned above, Jupyter Notebook is a popular tool for writing and running Python code in an interactive environment. It allows you to create notebooks that can contain code, text, images, and more. You can use Jupyter Notebook to run Python code locally, similar to how you do it in Google Colab. In most ways, Colab and Jupyter Notebook are very similar. In fact, you can save your Colab notebooks and use them in Jupyter Notebook. These files have a .ipynb extension rather than .py, as they have the information for the text cells in addition to the code cells.
If you want to use Jupyter locally, you can install it using pip. Open your terminal and run the following command:
pip install jupyter
This installs both Jupyter Notebook and Jupyter Lab. We recommend using Jupyter Lab, which has a more modern interface with support for multiple tabs and a file browser — similar to Google Colab. To launch Jupyter Lab, run:
jupyter lab
Note (Windows): If you get an error like 'jupyter' is not recognized as an internal or external command, use the following command instead:
python -m jupyter lab
This will open Jupyter Lab in your web browser, where you can create new notebooks or open existing ones. You can write and run Python code in the cells, add text and images, and save your work as a notebook file.
Note: You can also launch the classic Jupyter Notebook interface with jupyter notebook, but Jupyter Lab is more feature-rich and beginner-friendly.
AI and Python Development
If you want to use (and we encourage you to do so) AI in your Python projects, an IDE makes this much easier. The newer AI coding agents, directly integrated into the IDE or terminal, can do far more than simple code completion — they can help you plan, write, debug, and refactor entire projects. Below are the most popular AI coding tools available today.
Claude Code — Claude Code is a command-line coding agent from Anthropic that runs in your terminal. It is currently the most powerful AI coding tool available. It can understand your entire codebase, create and edit files across your project, run terminal commands, and help you architect solutions from scratch. It works with any IDE since it runs in the terminal. Claude Code is included with the Claude Pro plan ($20/month) and the Claude Max plans ($100/month or $200/month for higher usage). There is also a free tier with limited usage.
ChatGPT Codex — Codex is OpenAI's cloud-based coding agent, available through ChatGPT. It can write code, fix bugs, and work through multi-file tasks. Codex is included with ChatGPT Plus ($20/month) and ChatGPT Pro ($200/month). There is also a free tier with limited access.
GitHub Copilot — Copilot is an AI coding assistant that integrates directly into VS Code, PyCharm, and other IDEs. It provides inline code suggestions and autocompletion as you type, similar to the AI feature in Google Colab. Copilot has a free tier with limited completions, a Pro plan ($10/month), and a Pro+ plan ($39/month). Students can get Copilot Pro for free through the GitHub Student Developer Pack — just verify your student status with your university email to get access.
All of these tools can do more than code completion. You can work with an AI agent to plan and architect your code, then have it create functions, classes, and other elements of your project. To get the most out of these tools, you need to clearly understand the problem you are trying to solve and the steps to solve it. If you can describe the problem, the steps, and the expected output clearly, AI coding agents become extremely powerful.
Conclusion
Using Python locally can provide you with more flexibility and control over your projects. By following the steps outlined in this document, you can install Python, run scripts, and manage packages with pip. Additionally, using an IDE can enhance your development experience and make it easier to write and run Python code. Whether you're working on small scripts or larger projects, having Python set up locally can be a valuable skill.
Pre-Class Quiz Challenge
For this topic, there is no challenge to complete before class and turn in on the Learning Suite Pre-Class Quiz. As mentioned above, we will give a live demonstration of how to install Python and run a simple script locally. We will have TAs available to help you with any issues you may have with installing Python or running a script locally. If you want to get a head start, you can try installing Python and Jupyter Lab on your local machine before class. If you have any issues or questions, feel free to ask during class or reach out to the TAs for help.